Friday, February 28, 2014

Playing With Push Molds

My first polymer clay components were all made with textures impressed into them - either commercial rubber stamps or else designs I pressed into them with various tools.  Having created the designs, they were then cut out using cookie cutters or, in one case, the lid from an aerosol can.

So this week, I decided to try making some push molds, using a 2 part silicone compound.
To make molds, you take approximately equal amounts of each color of putty, mix them together and then press your object into the putty.  
In a few minutes the putty hardens into a rubbery silicone mold.  You then remove the object and viola, you have a mold into which you can press your polymer clay.  It sounds easy and fun.

I gave it a go earlier this week, using some buttons that had interesting textures.  But all the molds I made were lopsided.  It turns out that it is a bit tricky to press the button into the molding compound with exactly the same pressure on all sides.  Fellow AJE team member, Kristi Bowman, suggested that I try pressing the molding compound onto my objects, rather than pressing the objects into the mold.

So that's what I tried yesterday.  I used a fun flower shaped magnet and pressed a layer of molding compound onto the flower side.  Then I added more compound and built it up around the bottom and the edges, so it would be thicker, (when I made molds the first time, several were too thin on the bottom and they tore).
  When the compound hardened, I popped out the magnet and this is what I had.
It's certainly better than my first attempts, (for which I have no pictures), but if you look carefully at about the 9:00 position, you'll see that some of the petals have dents in them.  I think this is because I un-molded the magnet too soon and I damaged the still-soft mold while trying to get the magnet out.

Then I went through the same process with a heart shaped faux cinnabar bead.

I'd only worked with light colored polymer clay so far, so I decided to try something darker.  I mixed one part black clay with  three parks purple clay.  The purple was quite bright, so I wanted to mute it a bit.  
I
I pressed the polymer clay into the molds, popped it out, added holes at the top and placed the shapes on a piece of cardboard.
I placed the cardboard on top of a pizza stone that came with the oven, but you can also use an unglazed tile.  Then I covered it with an small inverted loaf pan and baked it for 45 minutes at 275F.

They came out of the oven nice and firm, but quite a bit darker than I had hoped.  I wanted a muted purple, like an aubergine, but these were nearly brown.  So I used some paints, in many layers, including some brighter highlights. That helped, but it is still not quite what I had pictured in my mind.
Its clear to me that I am still in the practice mode, with lots left to learn.  However, I keep reminding myself that I learn a lot when the outcome is less than what I'd hoped for.  Its a process and I'm learning step by step. And, hey, I burnt my first batch of polymer clay and I've never made that mistake again!


Linda
Linda Landig Jewelry – Etsy


Thursday, February 27, 2014

March Component of the Month & Giveaway

We’re not quite in March, but as it’s a Thursday, the day I usually post, I’m going to share my Component of the month for March. 


Please excuse the phone pic… I was battling against the light and my battery died!


You will have probably noticed that much of my work is inspired by nature, especially creatures that fly. Luna moths are my favourite subject at the moment, and these have been hand carved in porcelain, glazed, fired and re-fired with precious metal lustres. 

In real life, they’re beautiful insects, and quite cute looking. We’re not lucky enough to have them in the UK, but they’re common in North America, and can have a wingspan up to 115mm making them one of the largest. Mine aren’t quite that big, their wingspans are roughly 70mm.


This little guy’s wings are still folded as he has just emerged from his chrysalis so you can get a good look at his fuzzy legs and body. Cute!


And here he is with his wings fully spread... beautiful!

The Giveaway…

If you’d like to join in with the AJE team component of the month challenge and receive a (randomly chosen by me) Luna Moth pendant to use in one of your designs, it’s simple, 

Agree to the points below and comment on this post and 2 lucky winners will have moths sent out to them.


  • I will give away 1 component to each of 2 winners selected randomly from those who leave comments below this post. The design sent will be a surprise for the winners.
  • Please include your EMAIL address in your comment so that I can contact you ASAP should you win.
  • Please - only leave a comment if you can commit to creating a finished piece and blogging about it within the time given.
  • The names of the two winners will be announced on Sunday March 2nd 2014
  • This giveaway is open to US, Canadian, UK and European countries, but please be aware, US, Canadian & European addresses will have longer postage times (sometimes up to 3 weeks) 
  • The blog reveal will take place on Monday 31st March 2014

Good luck!

Caroline


Wednesday, February 26, 2014

Bead on it Board Review that has me smitten!

I know I said I was going to post more on the spiral rope for you all but this is what happened.  I drank some coffee and contemplated the beads I was going to use, picked up the house a bit, gathered the supplies that I had decided on, staged every thing, took a shower and came back down the stairs to turn on the camera.  Wouldn't you know it the batteries died.  Usually no biggie right?  Well if I had any AA batteries in the house it would have happened but there wasn't one anywhere to be found.  Oh no what to do?  Well it hit me I need to tell you all about the coolest purchase I have made for beading.

Bead On It Board!


Don't know what I am talking about well let me enlighten you.  I had seen the reviews and heard all my beading idols talk about it and yes I was curious but when I looked into it and thought "OMG that is expensive for a beading board!"  How could they be so in love with these boards?  

So this is what happened.  I was talking about them to my husband who of course said " you can make that."  Yes I do have a quilting background but I do not even for one second think I could tackle that.  Then I was chatting with my Aunt. Now let me tell you that is a trap for me.  She sees things I post and asks me about them and then sometimes she will end up giving them to me as a present.  I should know better but she is a sneaky one she is!  So I was telling her that a smaller tray would probably be so much better for me because my large tray is a bit on the ADD side.

She also had a very special custom order for me and said are you ready for this.."well don't you need this to make sure you complete my order properly?"  And she sent me the money to purchase it.  She is an angel she is.  

So I went to the site.  Cool thing is that each board is made by hand here in the US.  Not so cool for someone impatient like me it can take 10 to 14 days to get it.  It was late in the evening and I was complaining a bit about it to my husband that I hate waiting so while I was putting my son to bed he found the links page and went searching for me.  Before I got back to him it was ordered!  

So waiting and waiting not really long but it seemed like forever it came.  

OMG it came!

I am positively smitten!!  I have to tell you it is absolutely perfect!  I got the 8 x 14 board.  It sits perfectly on my lap (which kinda gave me a boost that my thighs are not wider than 14inches side by side..I know it is the little things) And since I always bead on my lap it has the perfect balance and does not slip no matter what I am wearing ( flannel pjs, slippery pjs, or jeans) it stays where I put it.
On my Lap!!!
Another cool thing is that when you put the seeds on it they sit hole side up!  And I mean every time!!!  I have no clue how this works but it is amazing and cuts some of the time I end up searching for the holes in a size 15 bead.  Here is a link to the video that show what I am talking about.

Okay and since you know I bead on my lap you also should know that my tray is never put away.  This one looks amazing on my end table.

So to tell you I am smitten doesn't even really cover it.  I am in love with my Bead On It Board!

Is there a special tool you splurged on that was totally worth it?  Tell me about it!

Kristen

Tuesday, February 25, 2014

How did I not know about this??!

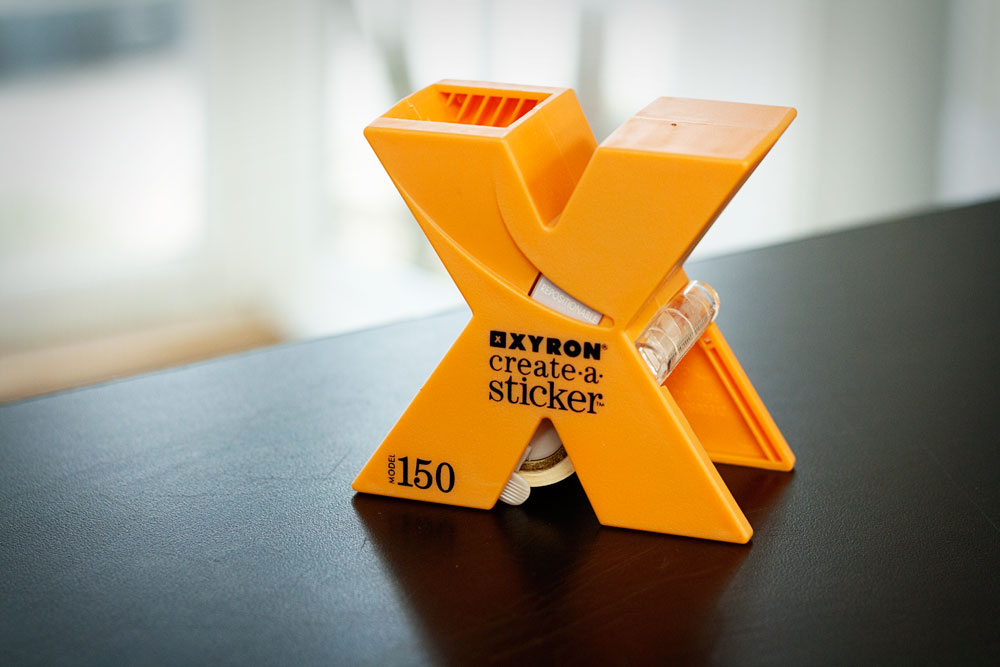
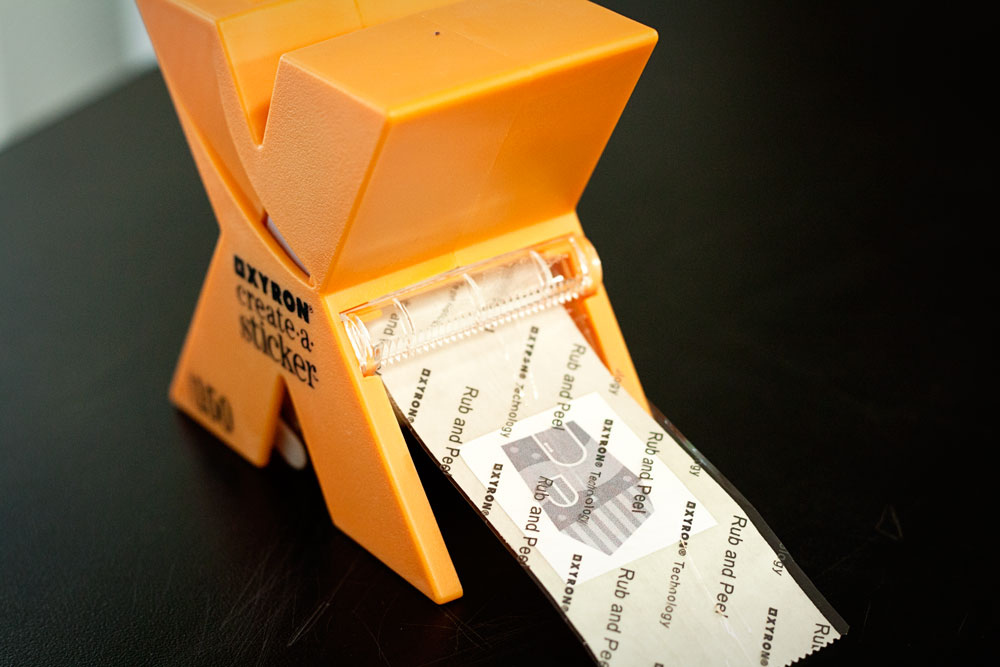
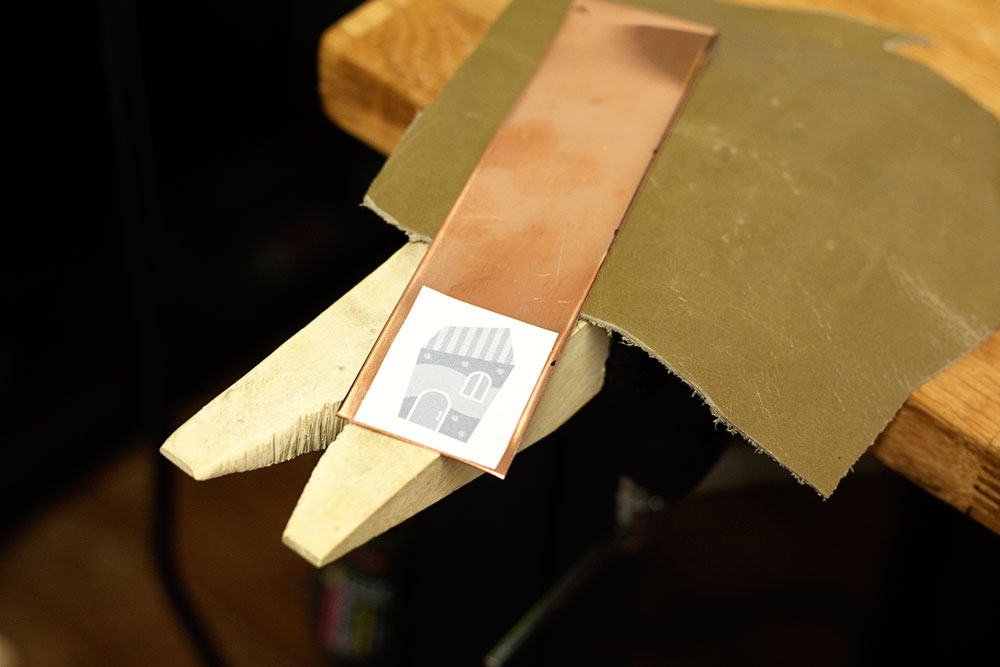
My friend Gail Stouffer introduced me to something the other day that just blew me away. We were working on fine-tuning the project prototypes for our upcoming retreat workshops, and it involved laying out some templates for sawing. She promptly pulled this out of her stash.

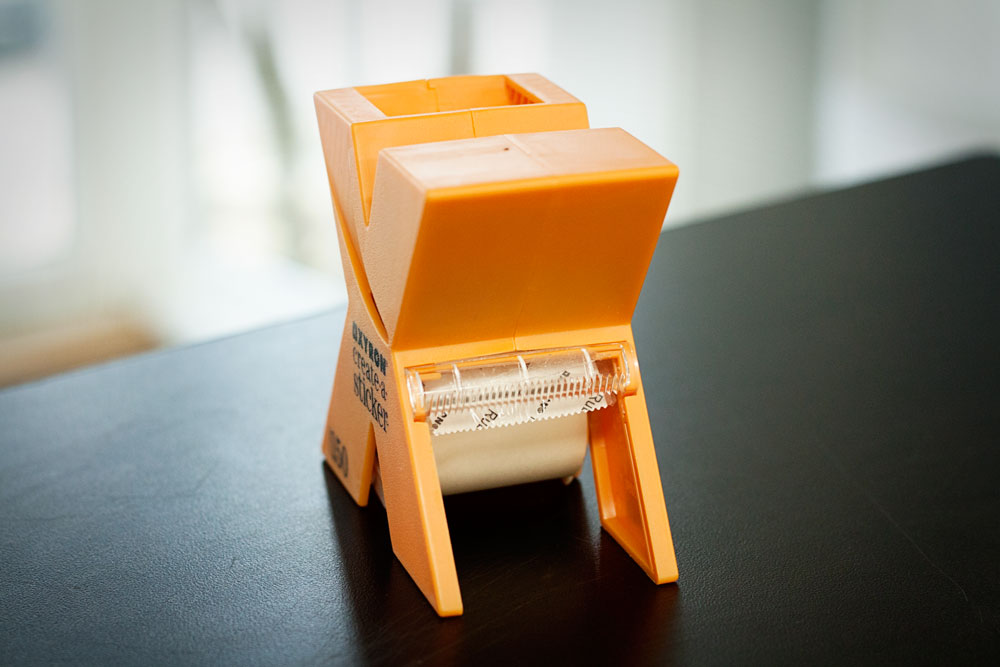
Sticker-Maker

Sticker-Maker-2

It's called the Xyron Sticker Maker (affiliate link) and apparently scrapbookers have known about it forever. Low tech - no batteries, handles or cranks - but it turns out to be an absolutely brilliant addition to the metals bench. And here's why: usually, affixing paper templates to the metal we're going to saw requires the use of spray adhesive or rubber cement. Both are smelly and messy. This, on the other hand, creates a perfect repositionable sticker that accomplishes the same thing.

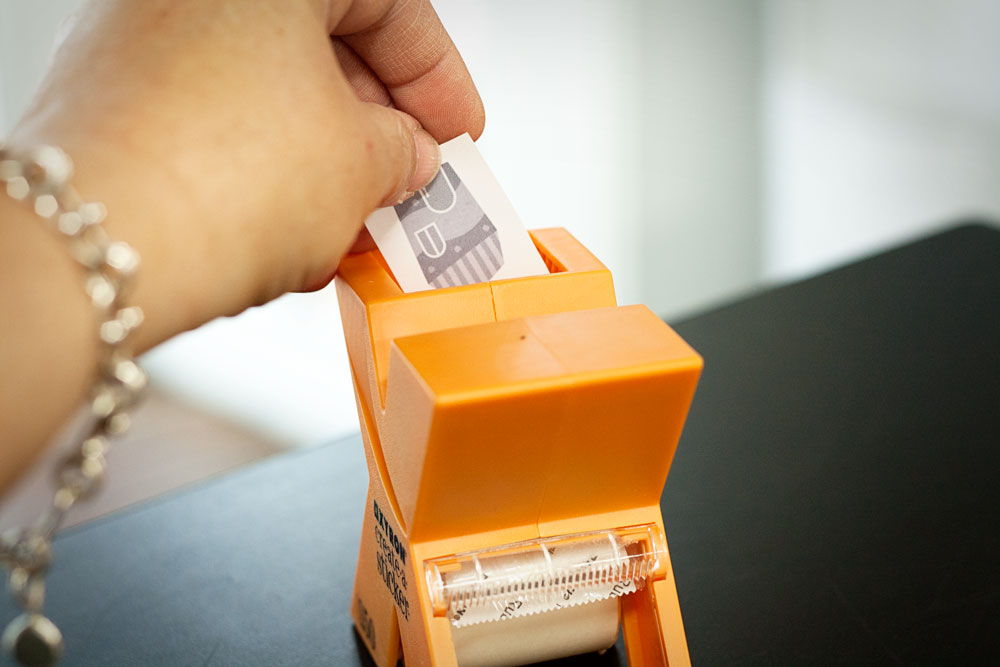
Simply print your image on plain paper, cut it out, and drop it face up into the hopper at the top of the unit.

Insert-Paper

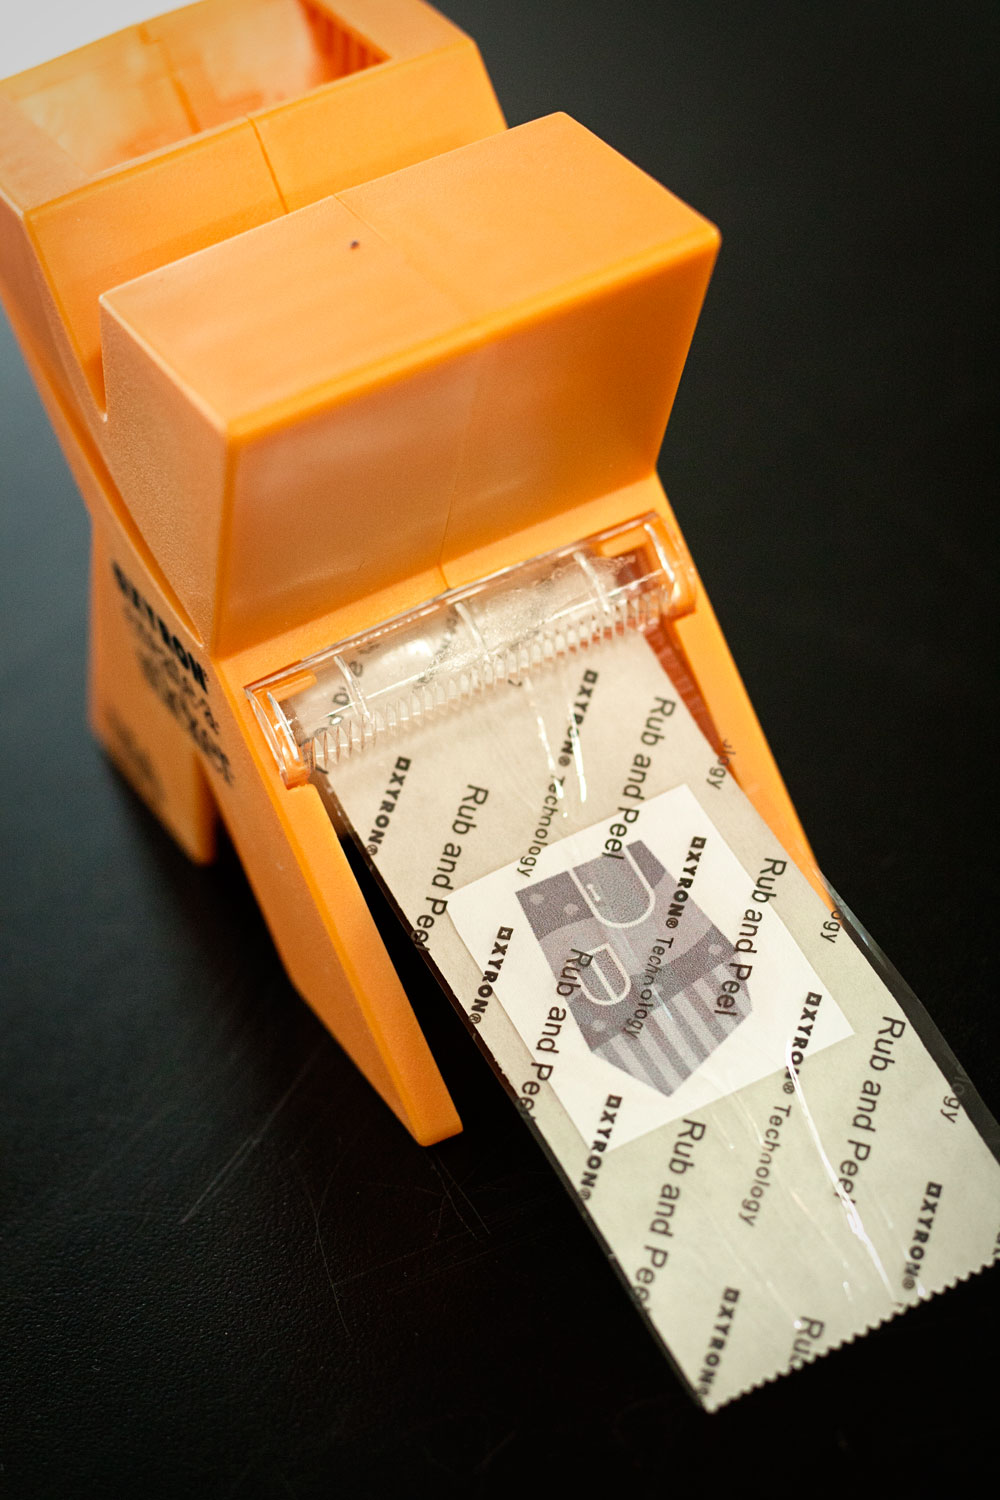
Then pull the end of the paper roll sticking out of the bottom of the unit.

Pull-Sticker

Pull-Sticker-2

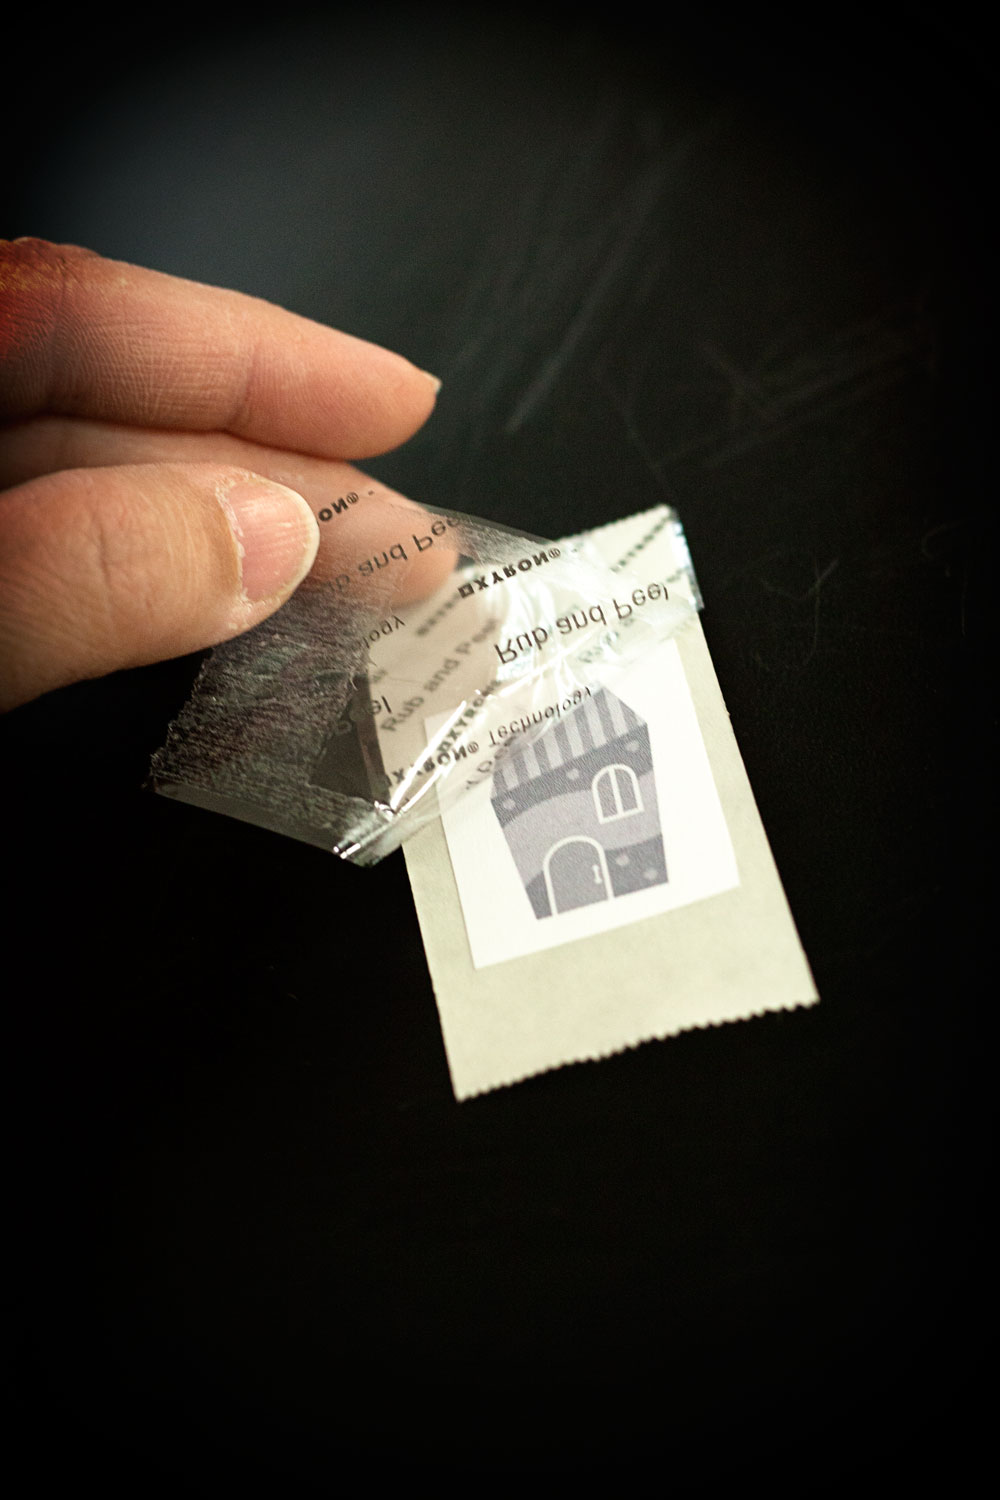
Rub the surface of the paper firmly, then peel off the clear plastic sheet on top.

Peel-Off-2

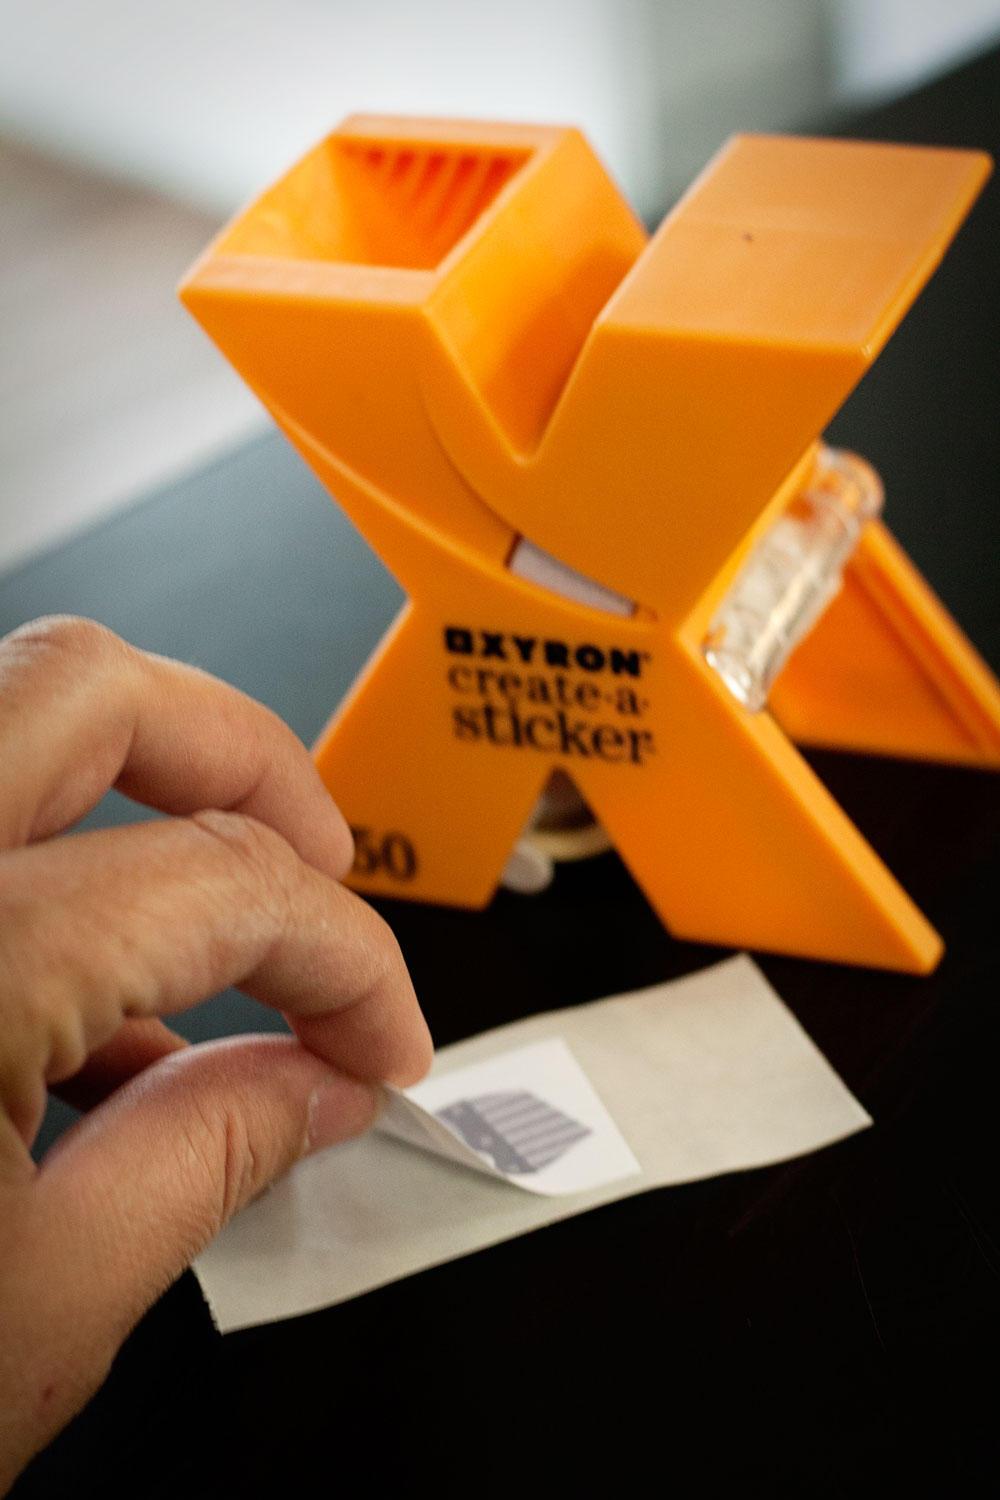
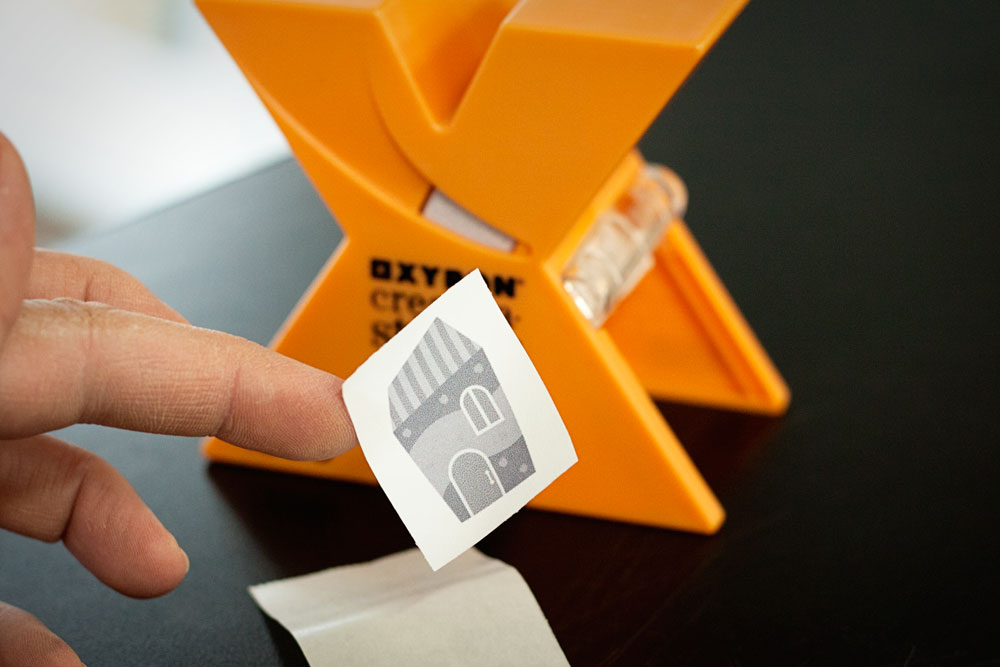
What you're left with is that classic waxy sticker paper with your own personalized sticker on it, ready to be used.

Peel-Sticker-1

Peel-Sticker-2

And it really works! Stick it on your metal and saw away - it won't move unless you peel it off.

On-Metal

It's absurdly inexpensive, too - $8 on Amazon for the unit and about $6 for the replacement cartridges (affiliate links). No smell, no mess, just a custom sticker perfectly sized for each project.

I love finding tools that make life easier! What's your "latest and greatest" tool find?

Until next time -


Monday, February 24, 2014

Making Polymer Stones and Sea Glass GIVEAWAY

Quite some time ago I purchased a class called
 Then somehow I forgot about it and never watched it (very strange I know) until last night!
 Can't believe I forgot about it!! It's a fun class and I can't wait to try making Stones. I was however able to try my hand at the Sea Glass. I need to get a couple more supplies before I can have a go at creating Stones.

My first attempt at the Sea Glass got away from me,
Cynthia warns you during the class not to walk away from them. I didn't actually walk away but I obviously wasn't paying close enough attention because before I knew it this is what happened.


Yup, I burned them, smoke alarm going off and the whole nine yards.
I was trying to get them out of the oven but wasn't prepared for having to do it so quickly.
OOPS!!
They also stuck to the paper which is a first for me, I guess it's not a surprise though.


Kind of cool looking actually but not a good thing.
Won't be doing that again I hope.


Better, only just slightly overcooked.


Almost there, the colors are a little bit to saturated but I didn't burn them!!

I had fun playing with this new technique and I'm really excited to try making Stones.
Maybe my next post will be about just that!

I've made some little Ammonite beads in Polymer before so I thought they might be the perfect thing to start playing with this Sea Glass mixture using my own aestetic.

Faux Sea Glass Ammonite beads.
These set of beads is available on HERE on Etsy.


Making Polymer Stones and Sea Glass
 
The Giveaway is now closed,
Congratulations to Jan Scarborough!!
 
Feel free to
Click HERE
and like the CRAFTCAST Facebook page.
And tell them who sent you!!
 
Kristi

Sunday, February 23, 2014

Ocean Inspired

I have always been inspired by the sea. This week I happen to be in Florida visiting my daughter Audrey. We visited the ocean today and I got re-inspired all over again. :)

Inspiration...

Photo by me, taken today (Feb. 22), Florida Atlantic Coast 
Shells collected by me today
Craggy shell I found today - amazing color and texture!

The Beads...


Inspiration (photos by others, as noted)...

Atlantic Ocean by Merek Misztal

Ocean by Omar Fallaha

The Beads....


Inspiration (photos by others, as noted)...

Ocean by Orient-Express

Ocean by Katarina Stefanović

The Beads....


Inspiration (photos by others, as noted)...

Unknown source, via One Trick Pony


The Beads...


I end my stay in Florida this Thursday (back to the frozen North!). I'm sorry to leave so soon - I really enjoyed my brief re-aquaintance with my old friend the Sea.

beachcombing from Karen Totten on Vimeo.